Wallet Widgets
Enhance your checkout experience with embeddable Accrue components for displaying wallet balances, rewards, and streamlined payment flows.
Overview
Accrue provides two types of widget integrations:
- Wallet Widgets – Prebuilt UI components to display wallet balances, rewards, and payment details.
- Inline Flow – A full, embedded checkout experience that retains customers on your site.
Getting Started
Loading Widget Data (Required)
Wallet widgets require user-specific data fetched from the Accrue API. Without it, widgets won’t render.
Widget Implementation Flow
- Backend: Fetch widget data from Accrue API (with secret key)
- Backend: Return the payload to the frontend
- Frontend: Load Accrue script with payload
- Frontend: Render widget elements
- Frontend: Handle widget events and updates
⚠️ Without valid payload data, widgets will not function correctly.
Option 1: Server-Side Rendering
GET /api/v1/widgets/wallet/:walletId
Response:
{
  "data": {
    "id": "wwd_123",
    "type": "WalletWidgetData",
    "attributes": {
      "payload": "base64_encoded_payload"
    }
  }
}
Include this in your page:
<script
  data-script="accrue-pay"
  defer
  src="https://pay[-sandbox].accruesavings.com/main.js"
  data-client-id="{your-client-id}"
  data-wallet-widget="{data.attributes.payload}"
></script>
Option 2: Client-Side Fetching
fetch('/api/accrue-wallet-widget/' + walletId)
  .then(res => res.json())
  .then(data => {
    window.accruePay.setWalletWidgetData(data.payload);
  });
Include Accrue Pay Script
<script
  data-script="accrue-pay"
  defer
  src="https://pay[-sandbox].accruesavings.com/main.js"
  data-client-id="{your-client-id}"
></script>
Widget Customization
Each widget can be customized per-merchant to match your brand and checkout flow. Customization is configured via the merchant dashboard or API — no code changes required after initial integration.
Visual Customization
- Custom Icon: Replace the default wallet icon with your own brand mark or logo. Provide a URL to any hosted image.
- Text Style: Control the typography weight and size of widget text. Options include default, small, semibold, or small semibold to match your checkout's design language.
Copy Customization
- Success Title: Set the headline users see after a successful payment (e.g., "Get rewarded", "You earned cashback", "Nice purchase").
- Success Description: Customize the message shown post-payment. Supports a
<reward>token that dynamically inserts the actual reward amount earned (e.g., "Open a wallet today and get<reward>"). - Button Text: Change the CTA label on the wallet prompt button (e.g., "Get started", "Open wallet", "Claim reward").
Toggle Behavior
The balance toggle lets users apply their wallet balance at checkout. Every aspect is configurable:
- Position: Place the toggle on the left or right side of the widget.
- Style: Choose between a checkbox or switch toggle style to match your form patterns.
- Status Label: Show or hide the "Applied" / "Not applied" status text next to the toggle.
Button Behavior
- Button Type: Render the wallet CTA as a standard button or as an inline text link, depending on how prominent you want it in the checkout flow.
Layout & Placement
Widgets are designed to drop into your existing checkout without layout changes. Common placements:
wallet-balance: Next to the order total or payment method selectorwallet-rewards: Below the cart summary or above the payment formwallet-payment-success: On the order confirmation page, above the receipt
All customization options are applied server-side per merchant — the same widget embed code works across all configurations. Change the look and copy without redeploying your checkout.
Widget Types
Wallet Widgets
| Widget | Purpose |
|---|---|
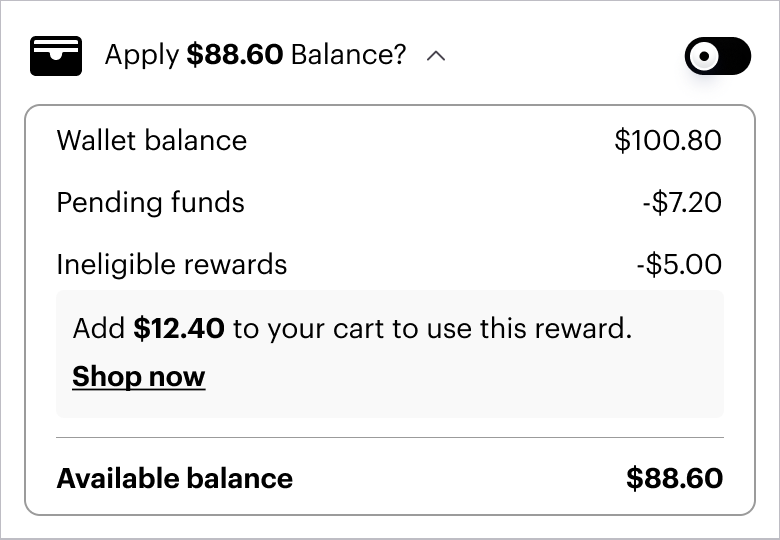
wallet-balance | Show and apply wallet balance |
wallet-rewards | Display expected rewards |
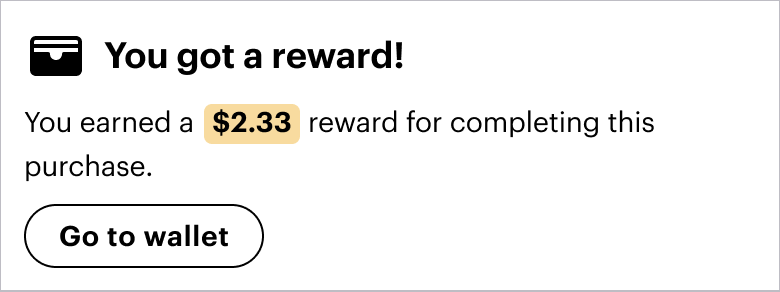
wallet-payment-success | Show earned rewards post-purchase |
wallet-balance Example
<accrue-pay widget="wallet-balance"></accrue-pay>

Script Setup:
<script
  data-script="accrue-pay"
  defer
  src="https://pay[-sandbox].accruesavings.com/main.js"
  data-client-id="{your-client-id}"
  data-wallet-widget="{data.attributes.payload}"
></script>

<script>
  document.addEventListener("AccruePay::Ready", () => {
    window.accruePay.onApplyBalanceToggle((payload) => {
      console.log("Balance toggled:", payload);
    });
  });
</script>
Programmatic control:
// To auto apply the wallet balance
window.accruePay.setBalanceApplied(true);
// To control the apply balance toggle's visibility (true to hide, false to show):
window.accruePay.setHideBalanceToggle(true);
wallet-rewards
<accrue-pay widget="wallet-rewards"></accrue-pay>

wallet-payment-success
<accrue-pay widget="wallet-payment-success"></accrue-pay>
Go to Wallet Event:
window.accruePay.onGoToWallet(() => {
  console.log("Go to Wallet clicked");
});
Inline Flow
✅ Controlled Integration
<accrue-pay flow="wallet"></accrue-pay>
document.addEventListener("AccruePay::Ready", () => {
  window.accruePay.onGetUserData(() => ({
    referenceId: "user-123",
    email: "user@email.com",
    phoneNumber: "+12125559999"
  }));

  window.accruePay.onPaymentIntentStart(() => ({
    walletId: "wallet-abc",
    amount: 9999,
    reference: "cart-xyz"
  }));

  window.accruePay.onPaymentIntentUpdate(intent => {
    console.log("Updated intent:", intent);
  });
});
🧩 Uncontrolled (iframe)
<iframe
  id="accrue-pay"
  src="https://pay[-sandbox].accruesavings.com/_/[flow]/?client={client-id}&wallet={wallet-id}&amount=9999&reference=order123"
  width="340"
  height="420"
  style="border:none;"
  onload="loadWalletWidgetData()"
></iframe>
function loadWalletWidgetData() {
  const iframe = document.querySelector("#accrue-pay");
  iframe.contentWindow.postMessage(
    {
      key: "AccruePay::WalletWidgetDataUpdated",
      data: { payload: "{payload}" }
    },
    "https://pay[-sandbox].accruesavings.com"
  );
}
window.addEventListener("message", (event) => {
  if (
    event.origin === "https://pay[-sandbox].accruesavings.com" &&
    event.data?.key === "AccruePay::PaymentIntentUpdated"
  ) {
    const intent = event.data.data;
    console.log("Intent received:", intent);
  }
});
✅ Best Practices
🧪 Environments
- Use sandbox credentials in dev/test
- Never expose production credentials in dev
🔐 Security
- Do not expose secret keys
- Use server-side proxies to retrieve widget data
⚙️ Performance
- Use
deferwhen loading SDK - Avoid unnecessary widget re-renders
- Group API requests when possible
🧠 UX Guidelines
- Display rewards before payment
- Place widgets close to cart totals
- Show loading states while fetching data
🚨 Error Handling
- Handle missing/invalid payloads
- Log SDK errors
- Provide graceful fallback when widgets fail
📬 Need Help?
Have questions or need onboarding support?
Email us: 📧 info@byaccrue.com
Accrue Pay's widget system helps increase conversions, reward loyalty, and reduce checkout friction with zero redesign required.