Getting Started with Accrue API
Everything you need to start building with the Merchant API
Introduction
The Accrue Merchant API provides a comprehensive set of endpoints that enable merchants to integrate Accrue's payment and wallet solutions into their applications. This guide covers the essentials you need to know to start building with our API, including authentication, environments, request formats, and best practices.
API Credentials
To access the Merchant API, you'll need two key credentials:
- Client ID: A public identifier for your application
- Client Secret: A private key used to authenticate secure requests
These credentials are provided when you set up an account with Accrue. You'll receive separate credentials for both sandbox (testing) and production environments.
Security Notice: Your Client Secret should be treated as sensitive information. Never expose it in client-side code or include it in publicly accessible repositories.
API Environments
Accrue provides two environments for the Merchant API:
| Environment | Base URL | Purpose |
|---|---|---|
| Sandbox | https://merchant-api-sandbox.accruesavings.com | Development and testing |
| Production | https://merchant-api.accruesavings.com | Live transactions |
We recommend that you:
- Develop and test your integration in the Sandbox environment
- Use test accounts and simulated payments to validate your implementation
- Only move to Production once your integration has been thoroughly tested
API Request Structure
The Accrue Merchant API follows RESTful design principles with these key characteristics:
-
HTTP Methods: Standard HTTP verbs define actions
GET: Retrieve resourcesPOST: Create resourcesPUT/PATCH: Update resourcesDELETE: Remove resources
-
JSON:API Format: All requests and responses follow the JSON:API v1.1 specification
- Consistent structure for resources and relationships
- Clear error formatting
- Support for sparse fieldsets and pagination
-
Content Type: All API requests should include:
Content-Type: application/vnd.api+json
Authentication
The Merchant API uses Basic Authentication with two distinct authentication models:
1. Private Requests (Server-side)
For secure operations that should only be performed from your backend:
Authorization: Basic {base64Encoded(clientId:clientSecret)}

Example operations requiring private authentication:
- Creating payment authorizations
- Capturing payments
- Retrieving sensitive customer data
- Managing webhooks
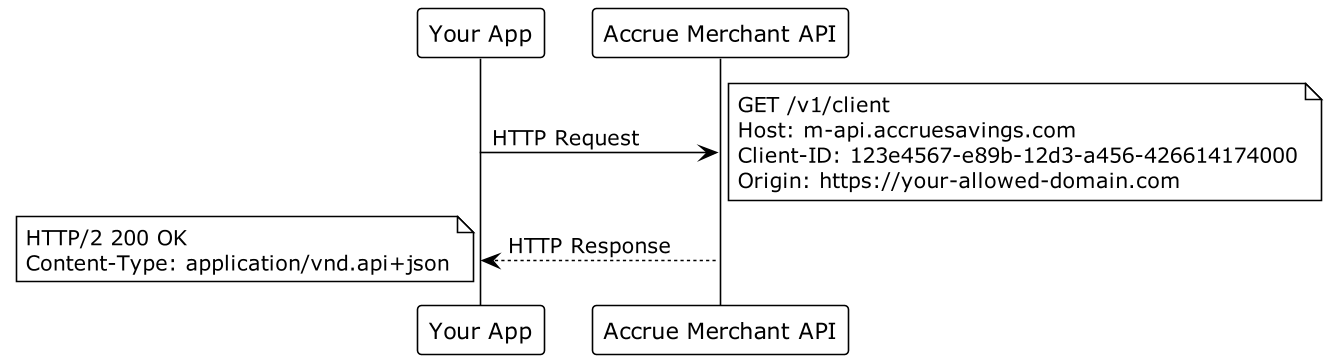
2. Public Requests (Client-side)
For operations that can be safely performed from user-facing applications:
X-CLIENT-ID: your-client-id
Example operations allowing public authentication:
- Creating payment intents
- Retrieving merchant public information
- Retrieving widget data
Making Your First API Request
Let's walk through a simple example of making an API request to get information about your merchant account:
Using cURL
# Public request example
curl -X GET "https://merchant-api-sandbox.accruesavings.com/clients/current" \
  -H "X-CLIENT-ID: your-client-id"

# Private request example
curl -X GET "https://merchant-api-sandbox.accruesavings.com/client-limits" \
  -H "Authorization: Basic $(echo -n 'your-client-id:your-client-secret' | base64)"
Using JavaScript (Node.js)
// Private request example
const fetch = require('node-fetch');

async function getClientLimits() {
  const clientId = 'your-client-id';
  const clientSecret = 'your-client-secret';
  const credentials = Buffer.from(`${clientId}:${clientSecret}`).toString('base64');

  const response = await fetch('https://merchant-api-sandbox.accruesavings.com/client-limits', {
    method: 'GET',
    headers: {
      'Authorization': `Basic ${credentials}`,
      'Content-Type': 'application/vnd.api+json'
    }
  });

  const data = await response.json();
  console.log(data);
}

getClientLimits();
Using Python
import requests
import base64

# Private request example
def get_client_limits():
    client_id = 'your-client-id'
    client_secret = 'your-client-secret'
    credentials = base64.b64encode(f"{client_id}:{client_secret}".encode()).decode()

    headers = {
        'Authorization': f'Basic {credentials}',
        'Content-Type': 'application/vnd.api+json'
    }

    response = requests.get(
        'https://merchant-api-sandbox.accruesavings.com/client-limits',
        headers=headers
    )

    return response.json()

print(get_client_limits())
Common Response Formats
Successful Response
{
  "data": {
    "id": "cli_12345abcde",
    "type": "clients",
    "attributes": {
      "name": "Example Merchant",
      "created_at": "2023-01-15T12:00:00Z",
      "status": "active"
    },
    "relationships": {
      "limits": {
        "data": {
          "id": "lim_67890fghij",
          "type": "client_limits"
        }
      }
    }
  }
}
Error Response
{
  "errors": [
    {
      "status": "401",
      "code": "unauthorized",
      "title": "Unauthorized",
      "detail": "Authentication credentials are missing or invalid"
    }
  ]
}
Handling API Responses
When working with the Accrue API, follow these best practices for handling responses:
-
Check HTTP Status Codes
2xx: Success4xx: Client error (invalid request)5xx: Server error
-
Validate Response Structure
- Confirm the presence of expected data
- Handle empty or null values gracefully
- Extract relevant IDs and attributes
-
Implement Error Handling
- Parse the error object for specific details
- Log errors appropriately
- Provide meaningful feedback to users
-
Handle Pagination
- Some endpoints return paginated results
- Check for
links.nextto determine if more pages exist - Implement pagination controls for large data sets
Rate Limiting and Quotas
The Accrue API employs rate limiting to ensure fair usage:
- Default Limits: 100 requests per minute per client
- Headers: Rate limit information is included in response headers:
X-RateLimit-Limit: Maximum requests allowed in the time windowX-RateLimit-Remaining: Remaining requests in the current windowX-RateLimit-Reset: Seconds until the limit resets
When you exceed rate limits, you'll receive a 429 Too Many Requests response. Implement appropriate backoff strategies to handle these cases gracefully.
Common Use Cases and Workflows
1. Payment Processing
The most common workflow involves creating and processing payments:
- Create a Payment Intent (frontend, public auth)
- Authorize the Payment (backend, private auth)
- Capture the Payment (backend, private auth)
- Complete the Payment (backend, private auth)
2. Wallet Management
Managing user wallets and balances:
- Retrieve Wallet Data (backend, private auth)
- Display Balance (frontend, using widget data)
- Process Deposits/Withdrawals (backend, private auth)
3. Webhook Integration
Receiving real-time updates:
- Register Webhook URL (backend, private auth)
- Receive Event Notifications (verify webhook signatures)
- Process Events (update order status, etc.)
API Integration Best Practices
Security
-
Keep Credentials Secure
- Store Client Secret securely using environment variables or a secrets manager
- Never expose your Client Secret in client-side code
- Rotate credentials periodically
-
Validate Webhook Signatures
- Always verify webhook signatures to prevent spoofing
- Use constant-time comparison algorithms
Reliability
-
Implement Idempotency
- Use idempotency keys for non-idempotent operations (POST, PUT)
- Handle duplicate requests gracefully
-
Retry Strategy
- Implement exponential backoff for failed requests
- Set appropriate timeouts
Performance
-
Optimize Request Volume
- Cache frequently accessed data
- Batch operations when possible
- Implement pagination for large data sets
-
Monitor API Usage
- Track response times and error rates
- Set up alerts for API failures
Testing Your Integration
-
Use Sandbox Environment
- Test all flows in the sandbox environment before going live
- Create test accounts and simulate various scenarios
-
Test Edge Cases
- Insufficient funds
- Network errors
- Timeouts
- Concurrent operations
-
End-to-End Testing
- Validate complete workflows from frontend to backend
- Test webhooks and asynchronous operations
Going Live
Before moving to production:
-
Complete the Integration Checklist
- All required endpoints are implemented
- Error handling is comprehensive
- Security best practices are followed
-
Switch to Production Credentials
- Update API base URL to production
- Use production Client ID and Secret
-
Monitor Initial Transactions
- Closely watch first live transactions
- Have a rollback plan if issues occur
The Accrue Merchant API provides a powerful foundation for building custom payment experiences. This guide covers the basic concepts to get you started. For payment authorization flows and authentication details, see the Merchant API Integration guide. The complete API reference contains detailed information for each endpoint.
Ready to start building with the Accrue API?
Contact us at info@byaccrue.com to get your API credentials