Customizing the Trigger Component
Create a seamless experience for launching the Accrue wallet integration
Introduction
To launch the Accrue wallet integration, users need to interact with a trigger component on your site. This guide covers the various options for implementing and customizing this trigger to match your brand and user experience requirements.
The SDK provides three approaches to triggering the wallet integration:
- Default Trigger - A fixed position bubble in the bottom-right corner
- Banner Trigger - A configurable banner that can be positioned anywhere
- Custom Trigger - Using any existing element on your page as a trigger
Default Trigger Component
The web SDK configures a fixed position bubble in the bottom-right corner of the website as the default trigger. Clicking on the bubble launches the wallet frontend experience.
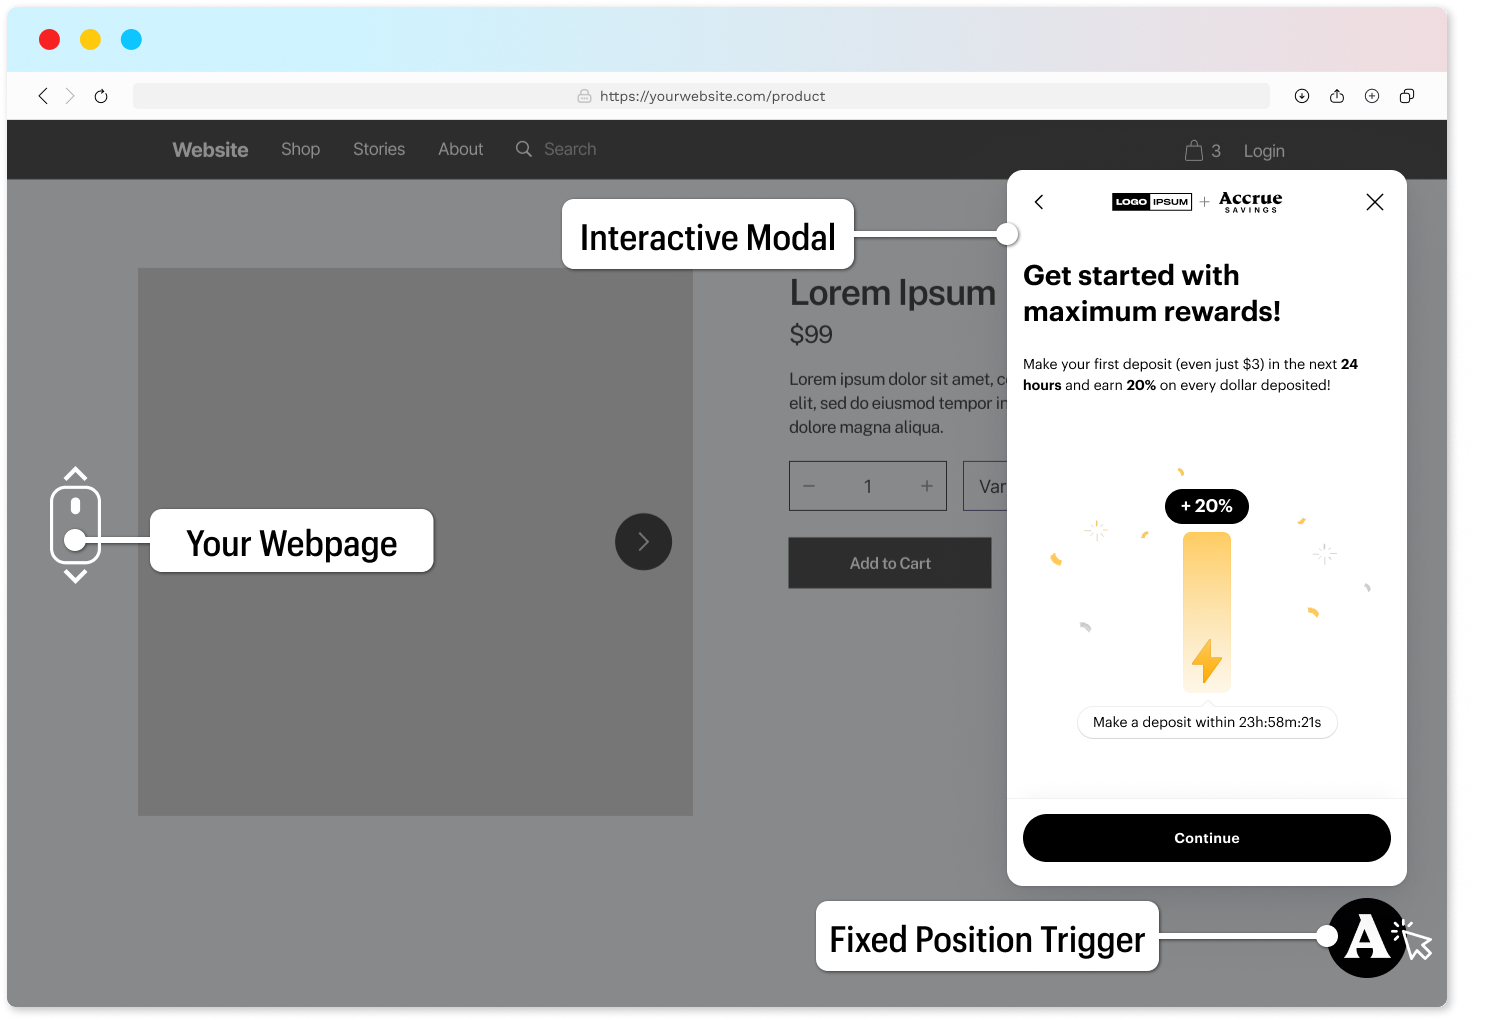
The default trigger is automatically enabled when you:
- Don't specify any custom trigger
- Don't implement a banner trigger
This approach requires minimal configuration and is ideal for quick implementations or testing.
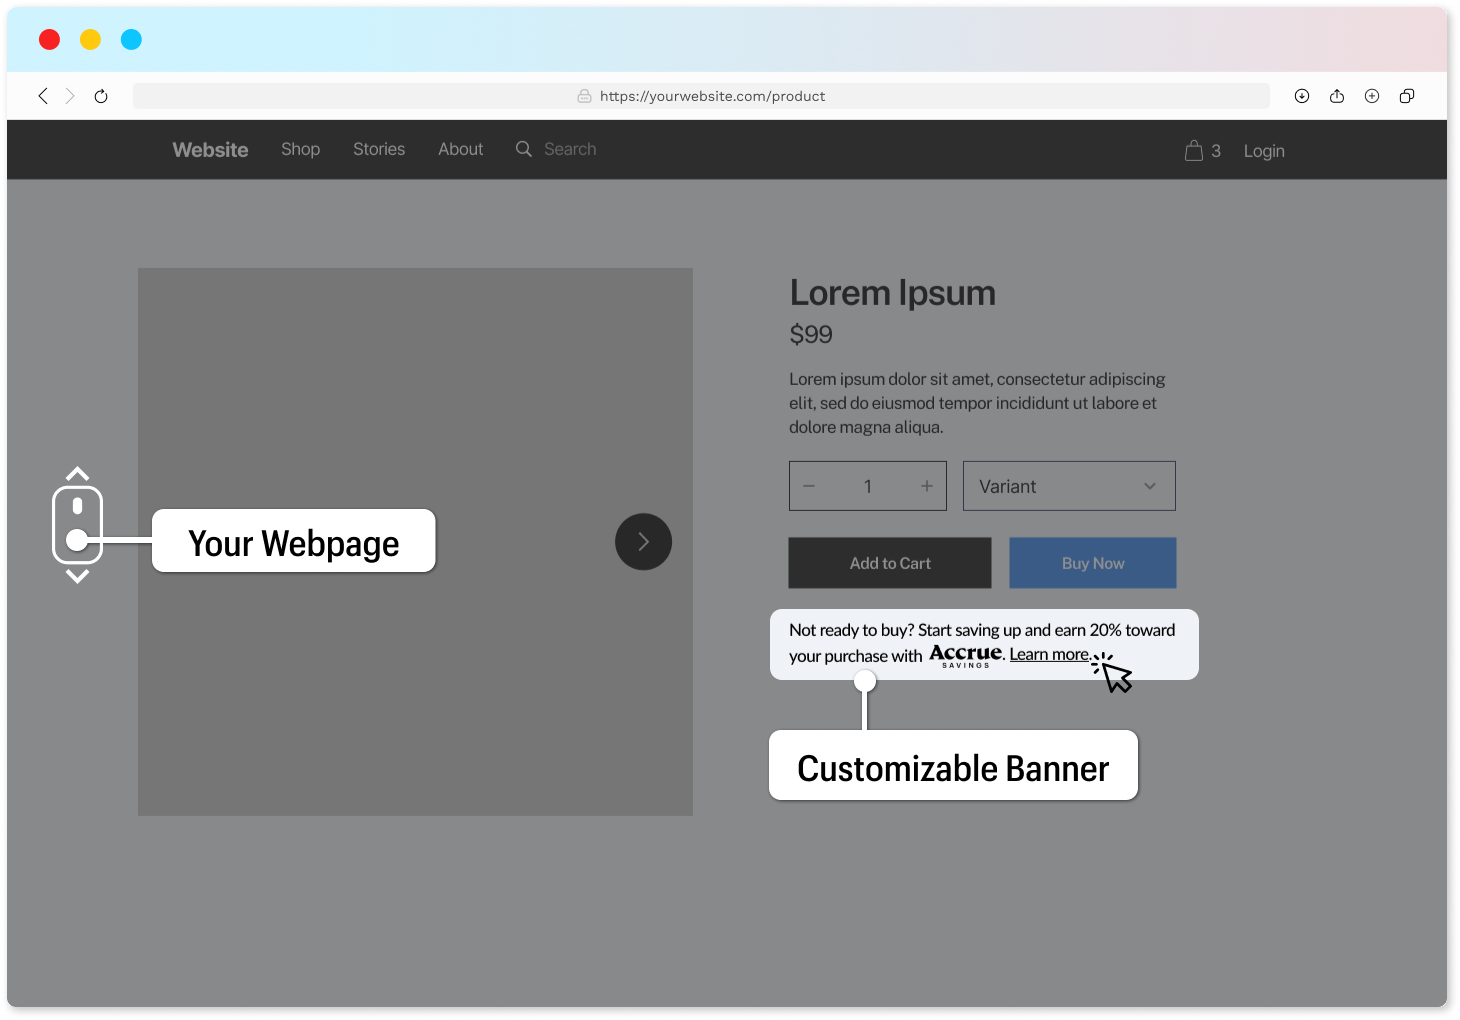
Banner Trigger Component
The SDK supports a configurable banner HTML element that can be positioned anywhere on your webpage. This option gives you more flexibility with placement and messaging.
Customizing Banner Content
You can customize the catchline text to reflect your brand voice and include reward values specific to your offering. The banner supports both static text and dynamic values using placeholders:
| Placeholder | Description |
|---|---|
{rewards} | The minimal amount of rewards you are offering |
{merchantName} | Name of your company, website or shop |
{accrueLogo} | Full Accrue logo |
{accrueLogoSymbol} | Condensed Accrue logo |
{learnMore} | Learn More link |
{getStarted} | Get Started link |
Banner Examples
Here are some example banner implementations:
Example 1:
{accrueLogo} Save up and earn {rewards} in cash rewards towards your purchase.
See how.

Example 2:
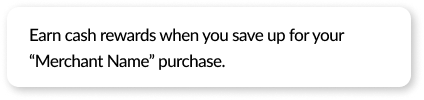
Earn cash rewards when you save up for your {merchantName} purchase.
Example 3:
Love them, but not ready to buy today? Save with Accrue and get
{rewards} toward your purchase. Learn more.

Banner Placement
There are two methods for placing the Accrue banner on your page:
1. Using the Custom HTML Tag
The SDK defines a custom HTML element accrue-savings-placement that can be inserted directly in your markup:
<accrue-savings-placement></accrue-savings-placement>
2. Using a CSS Selector
Apply the class accrueSavingsPlacement to any element where you want the banner to appear:
<div class="accrueSavingsPlacement"></div>
Custom Trigger
For complete control over the trigger appearance, you can use any existing element on your page as a trigger. This approach gives you maximum flexibility for integrating the wallet experience within your UI.
Simply add the CSS class accrueSavingsTrigger to the element you want to use as a trigger:
Custom Div Example:
<div class="accrueSavingsTrigger">Start Saving with Accrue</div>
Custom Link Example:
<a href="#" class="accrueSavingsTrigger">Start Saving</a>
Custom Image Example:
<img src="./image.jpg" alt="Accrue" class="accrueSavingsTrigger" />
The SDK will automatically attach event listeners to any elements with this class, launching the wallet experience when they're clicked.
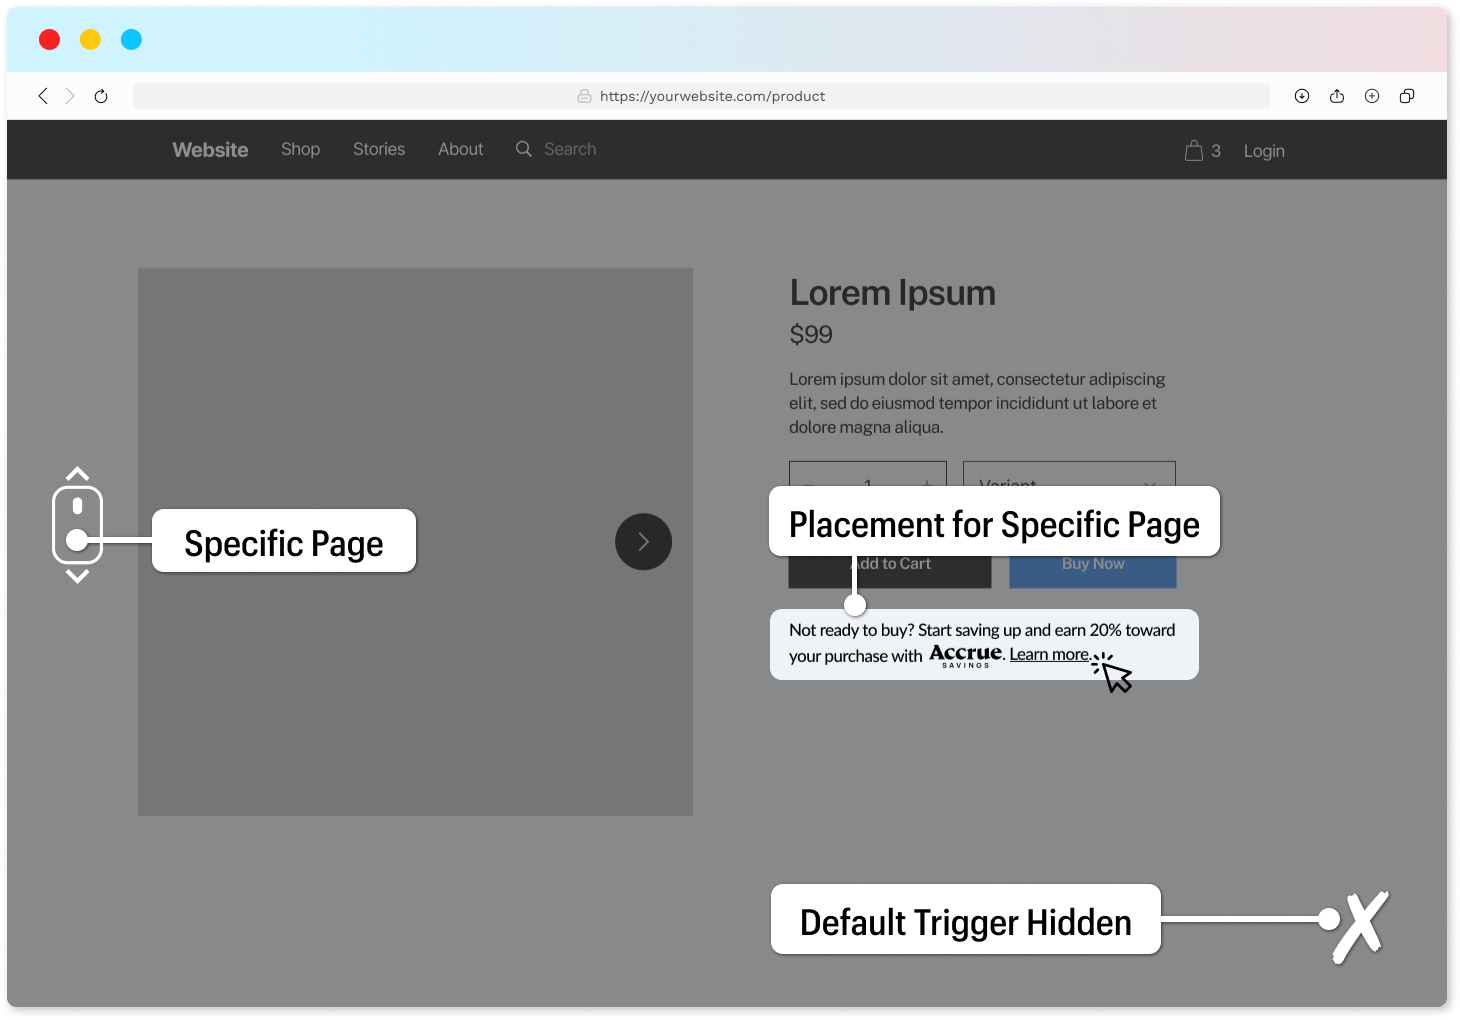
Display Rules
Once you've determined the placement for your trigger component, you may want to control when it appears. The SDK supports rules to explicitly hide or show the trigger component based on:
- Current URL - Show or hide the trigger depending on which page the user is viewing, using exact matches or pattern matching
- Page Content - Show or hide the trigger when certain HTML elements are present on the current page
Placement Override
Based on display rules, you can also modify the trigger placement for specific pages, ensuring the optimal presentation across your site.
Deep Linking
By utilizing display rules, you can configure the wallet frontend to display specific panels instead of the default view. For example, you might want to show the buy panel directly at checkout.
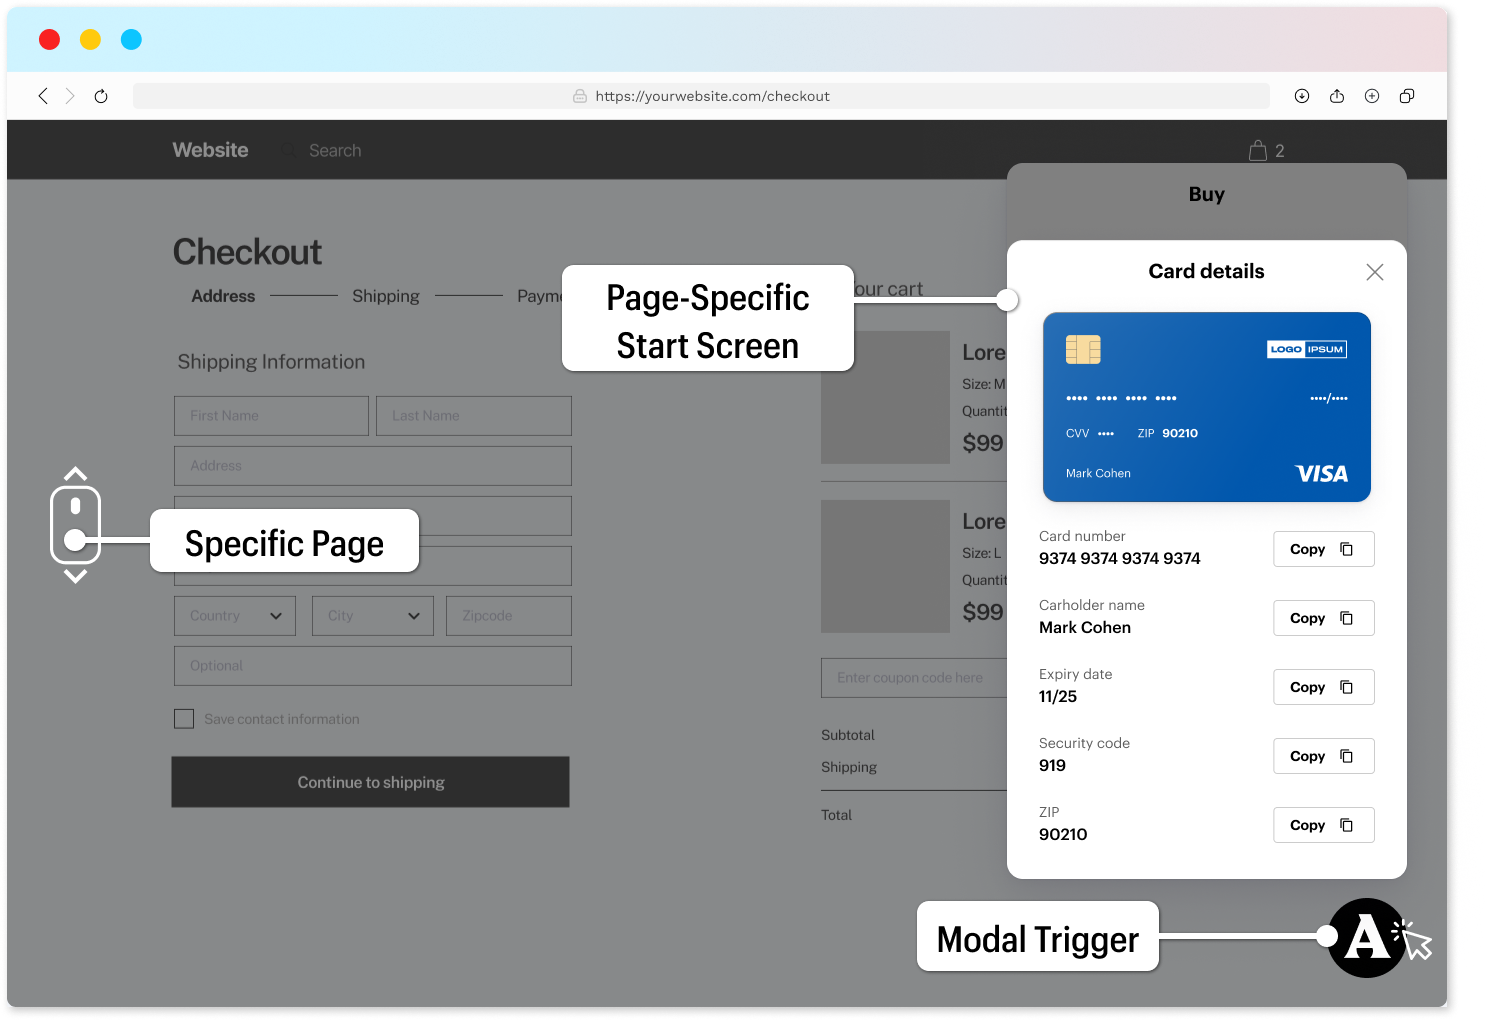
The Web SDK supports various deep linking opportunities. Please consult with your Accrue account manager for additional configuration options and best practices.
Implementation Best Practices
-
Choose the right trigger type for your site:
- Default trigger for simple implementations
- Banner trigger for more prominent messaging
- Custom trigger for seamless integration with your UI
-
Optimize placement based on your site's layout:
- Test different positions to maximize visibility without disrupting the user experience
- Consider using display rules to show different triggers on different pages
-
Craft compelling messaging that:
- Clearly communicates the value proposition
- Matches your brand voice
- Highlights the specific rewards available
-
Test thoroughly across different:
- Devices and screen sizes
- Browsers
- Page layouts
A well-implemented trigger component is the gateway to the Accrue wallet experience. By carefully considering the placement, design, and messaging, you can maximize engagement and adoption of the Accrue platform.
Need help customizing your trigger component?
Contact us at info@byaccrue.com for personalized assistance